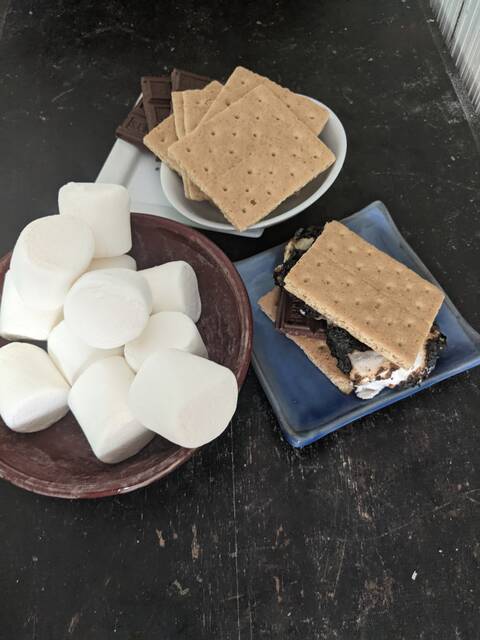
S’mores are a treat that brings memories of a simpler time. It’s hard to imagine the magic of a campfire without the delicious touch of a classic s’more.
Some of my favorite nights by the fire have always involved food. No matter how good the food is, if there isn’t a s’more to finish the fireside dining it just doesn’t feel like a complete meal.
We all have memories of fetching a perfect stick to skewer a marshmallow with. I can still remember going to my first summer cookout with a youth group in Germantown, Kentucky in the early 1990s. I looked and looked for that perfect stick for the perfect marshmallow cook. In the end, it wouldn’t have mattered what I baked my marshmallow on. Much to the dismay of the adults, I ended up burning my fluffy treat into charcoal. I must have eaten at least four or five of those beautifully burned treats.
I never had the patience for the slow bake. Thirty years later, that’s how I still prefer them. Whether you’re using a stick, cast iron skillet, aluminum foil, a kabob, or rotisserie skewer, make sure when cooking on a fire you are using something that is simple and appreciates the slow lingering time by the campfire and taste-buds. Basic ingredients can produce gourmet flavor that is a sneaky surprise for such little work.
Today, I have included a few suggestions to take your classic s’more to another level. Or maybe just make it even more of an activity for the campfire crew. Not going near a campfire anytime soon? S’mores can be achieved indoors with a candle, microwave or even gas stovetop.
Today I have included a few suggested add ons for a s’mores buffet. Even with the classic ingredients each s’more is always a little bit different. Just make sure you have plenty of napkins or wipes.
Feel like going the extra mile? I’ve also included my recipe for a classic homemade Bourbon marshmallows for the adults. In a hurry? Just do what you can and grab a bag from the store if you don’t have time.
Good luck and enjoy!
S’more Tips:
a) Utilize a pair of tongs or a pocket knife.
b) Bring an extra pan to place things on after cooking.
c) Using a metal skewer? Rub a little neutral cooking oil over the end where the marshmallows go to prevent sticking.
S’more for S’mores:
— Sprinkle sea salt or coarse kosher salt over chocolate
— Chili flakes
— Strawberry, raspberry or cherry jam
— Peanut butter
— Peeps are a fun way to shake up normal marshmallow shapes and colors.
— Fresh berries
— Coconut flakes
— Sliced almonds or other favorite cookies.
— Crumbled oreos
— Switch up your chocolate. Try white chocolate or dark chocolate. Even heath bars are a fun twist.
Homemade Bourbon Marshmallows
Tip: Bourbon is my preference, but if you prefer you could use other liquors such as Amaretto, Grand Marnier, or any such added adult flavor.
3 envelopes unflavored gelatin
½ cup cold water
2 cups granulated white sugar
⅓ cup light corn syrup
½ cup Bourbon
3 large egg whites
¼ tsp salt
¼ teaspoon salt
2 tsp vanilla extract
1 vanilla bean, halved and scraped
½ cup cornstarch
½ cup powdered sugar
Using a small bowl, combine the 3 envelopes of unflavored gelatin and 1/4 cup of the water. Mix and let stand. If you don’t have all other ingredients ready at this time, gather ingredients while letting gelatin stand. This will help make the process much easier.
In a small saucepan, combine 2 cups of sugar and the remaining water and warm it over a medium low heat. A minute later, add in ⅓ cup corn syrup and turn the heat up to medium-high. Bring the mixture to 240 degrees F.
While heating you can use the time to multitask another step. Using a stand mixer, mix the three egg whites and ¼ teaspoon salt on low until they are just a bit foamy. Turn the mixer off. Going back to the syrup, when the sugary syrup hits 250 degrees F, turn off the heat and add the following to the mix: ½ cup of bourbon and the gelatin mixture. While the gelatin melts, turn the stand mixer back on, this time to high, and start whipping those whites up. Once the whites have become fluffy and pillow-like, very slowly pour the syrup mixture into the mixer bowls. Take your time. You do not want to be splashed with boiling hot syrup. Add in the two teaspoons of vanilla extract and scraped vanilla bean seeds and whip it until the mixture is fluffy, stiff and the outside of the bowl is cool to the touch.
While that is going on, using a large mixing bowl, sift together ½ cup cornstarch and ½ cup powdered sugar. This is going to be the coating for the marshmallows.
Now heavily coat a baking sheet with some of the marshmallow coating. Leave no bare spots. Pour the fluffy marshmallow creme onto the baking sheet, using a spatula to even it out. Dust it with some of the coating and then let it sit for about 5 hours, uncovered.
Using a pizza cutter or oiled knife, dusted with some of the coating, cut the marshmallows into any shape or size you want. This is a great time to bust out some fun cookie cutters. Smaller is easier.
As you cut each strip, turn it to coat the cut ends with sugar, and as you cut each individual marshmallow, do the same. All the sides should be well coated and not sticky.
These can be made up to a week in advance and stored in an airtight container. Good luck on them lasting that long. They are delicious. You even can make a batch and then freeze them. Just lay them out on a baking sheet and freeze for an hour. Then load them into heavy-duty zip lock freezer bags. They’ll last 3-4 months.
The recipe and photo used in today’s article are from the kitchen of Chef Babz ([email protected]).


